Split the conversation view
You can show several conversations next to each other or one above the other. Each pane has its own input, org, model, and mode, so you can work on separate tasks at the same time.
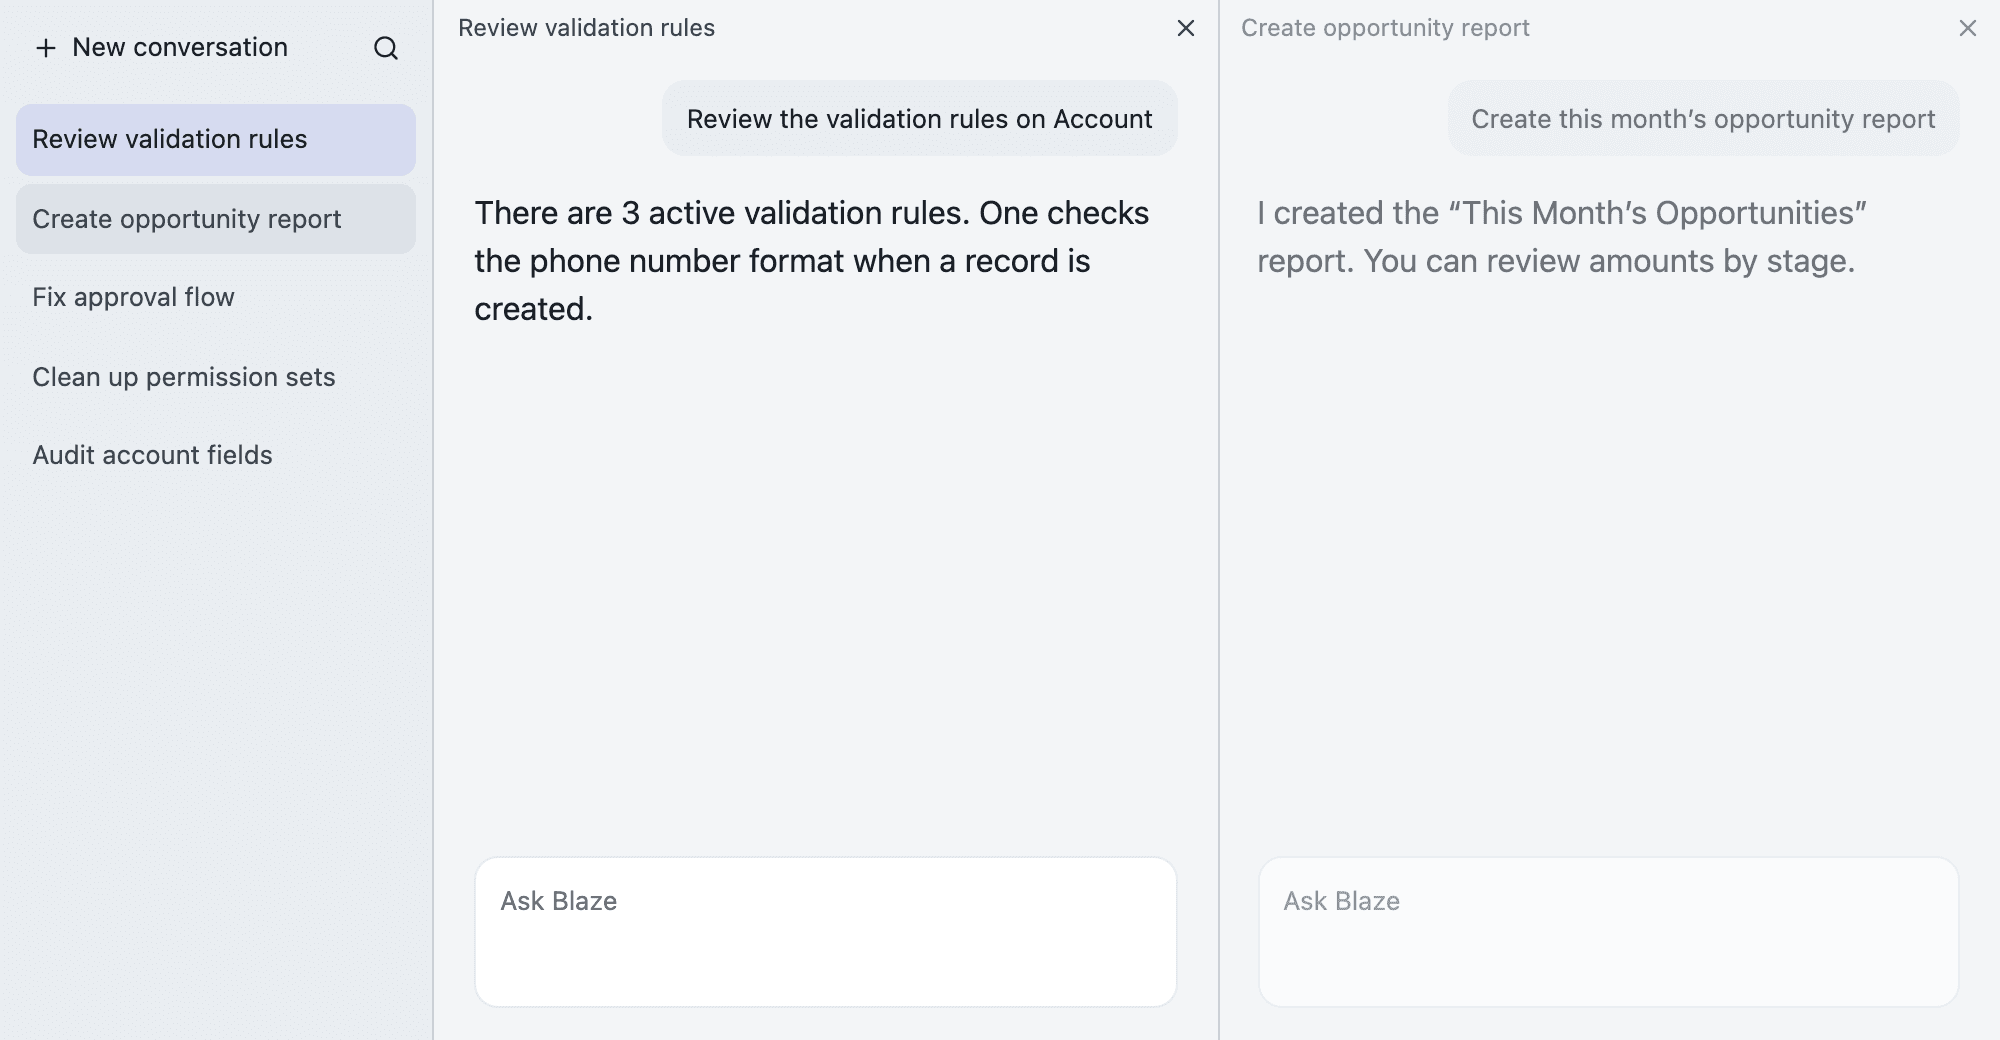
Place a conversation next to another
Use either method to place a conversation from the conversation list.
| Action | Result |
|---|---|
| Hold Option on Mac or Alt on Windows and click a conversation in the list | The conversation opens on the right |
| Drag a conversation from the list onto a pane | The conversation opens on the left, right, or bottom, depending on where you drop it |
While you drag, the pane shows what will happen when you release.
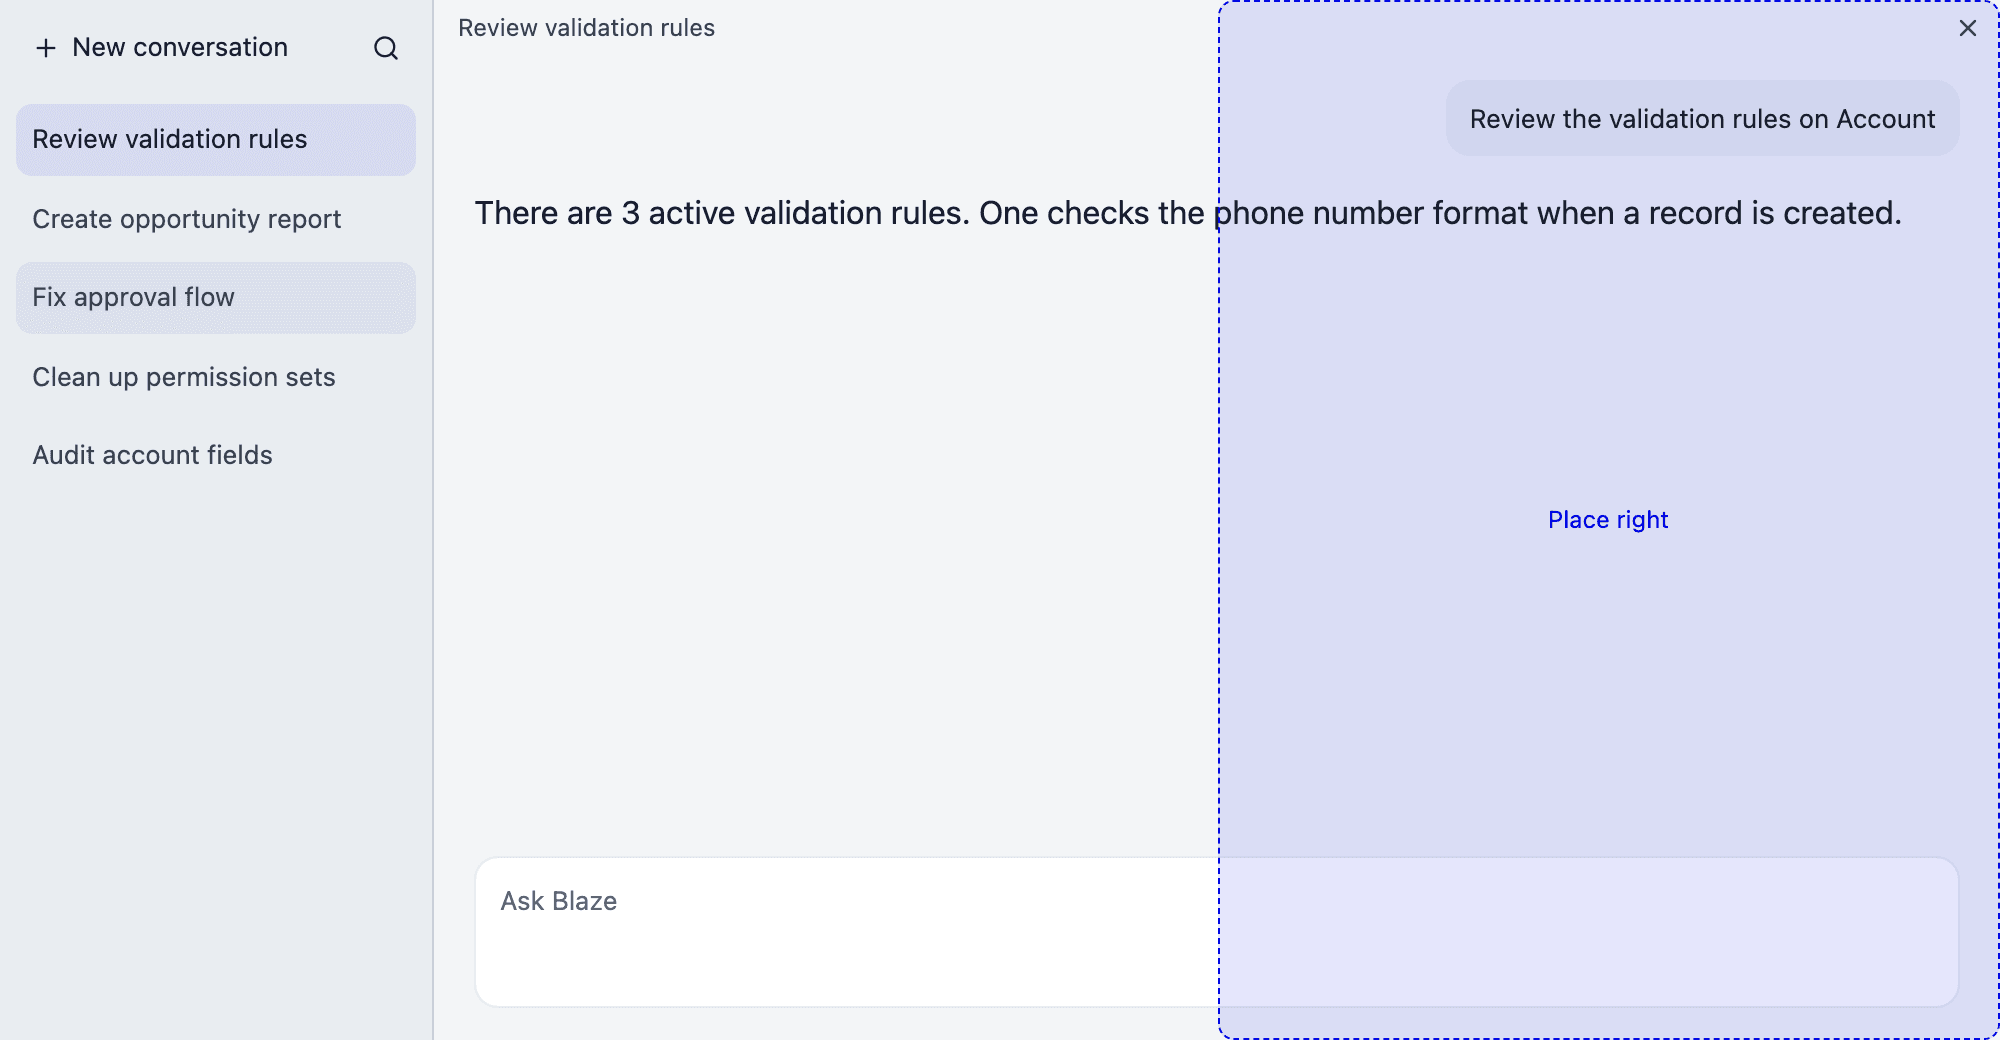
| Label | When you release |
|---|---|
| Place left | Places the conversation to the left of that pane |
| Place right | Places the conversation to the right of that pane |
| Place below | Places the conversation below that pane |
| Open here | Opens the conversation in that pane |
If the conversation is already on screen, Blaze moves to its pane instead of creating a new one.
Add a new conversation
Right-click a conversation pane and choose Split left, Split right, or Split down. A pane with a new conversation opens. This menu does not appear when you right-click the input.
When two or more conversations are side by side, you can also move or close a pane from this menu.
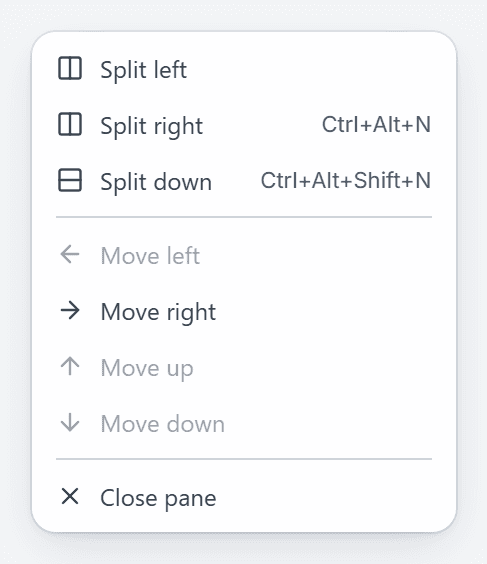
Split a pane again to show three or more conversations.
Switch panes
The active pane is shown more strongly than the others. Click a dimmed pane to make it active.
Each pane keeps its own draft. You can keep working in one pane while a task runs in another.
Choose the org, model, and mode for each pane
The bottom of each pane’s input shows the org and model that the pane uses. You can switch them separately for each pane. You can also switch the mode, such as Approval Mode, for each pane.
Switching the org or model in one pane does not change the other panes, so you can work in different orgs side by side.
Resize panes
Drag the border between panes. You can also move the border with the keys in the table below.
Move a pane
Drag the conversation title at the top of a pane and release it over another pane. While you drag, the pane shows where it will move, such as Move left.
You can also right-click a pane and choose Move left, Move right, Move up, or Move down. Directions that are not possible are unavailable.
Close a pane
Click × at the top right of the pane. You can also right-click the pane and choose Close pane.
Closing a pane does not delete the conversation. You can open it again from the conversation list.
Keyboard shortcuts
| Action | Mac | Windows |
|---|---|---|
| Split right | ⌥⌘N | Ctrl+Alt+N |
| Split down | ⌥⇧⌘N | Ctrl+Alt+Shift+N |
| Close current pane | ⌥⌘W | Ctrl+Alt+W |
| Focus an adjacent pane | ⌥⌘ + arrow key | Ctrl+Alt + arrow key |
| Move the divider | ⌃⌘ + arrow key | Ctrl+Alt+Shift + arrow key |
No keys are assigned to moving panes by default. In Shortcuts in Settings, you can assign keys to Move pane left and the other move actions.
You can change these keys. See Change keyboard shortcuts.
When you restart Blaze
When you restart Blaze, the conversations you placed side by side come back, along with each pane’s org, model, and Approval Mode. Requirements Mode and Browser test mode are not restored.
When you send from the launcher
Sending from the launcher while conversations are side by side does not change your layout. The new conversation runs in the background, and you can open it from the conversation list.
When the in-app browser is open
While the in-app browser is open, Blaze shows only the active pane. When you close the browser, the split layout returns.
In-app browser tabs are separate for each conversation. The browser shows the tabs for the conversation in the active pane.