Skills
1. What is it?
A Skill is a reusable package of prompt + configuration. Put the requests
you make often (write an ER diagram, run a code review, generate a report for a
specific object) into a Skill, and you can invoke them with /<skill-name> from
the chat input (e.g. /kobe, /lwc-generator).
2. Where to manage them
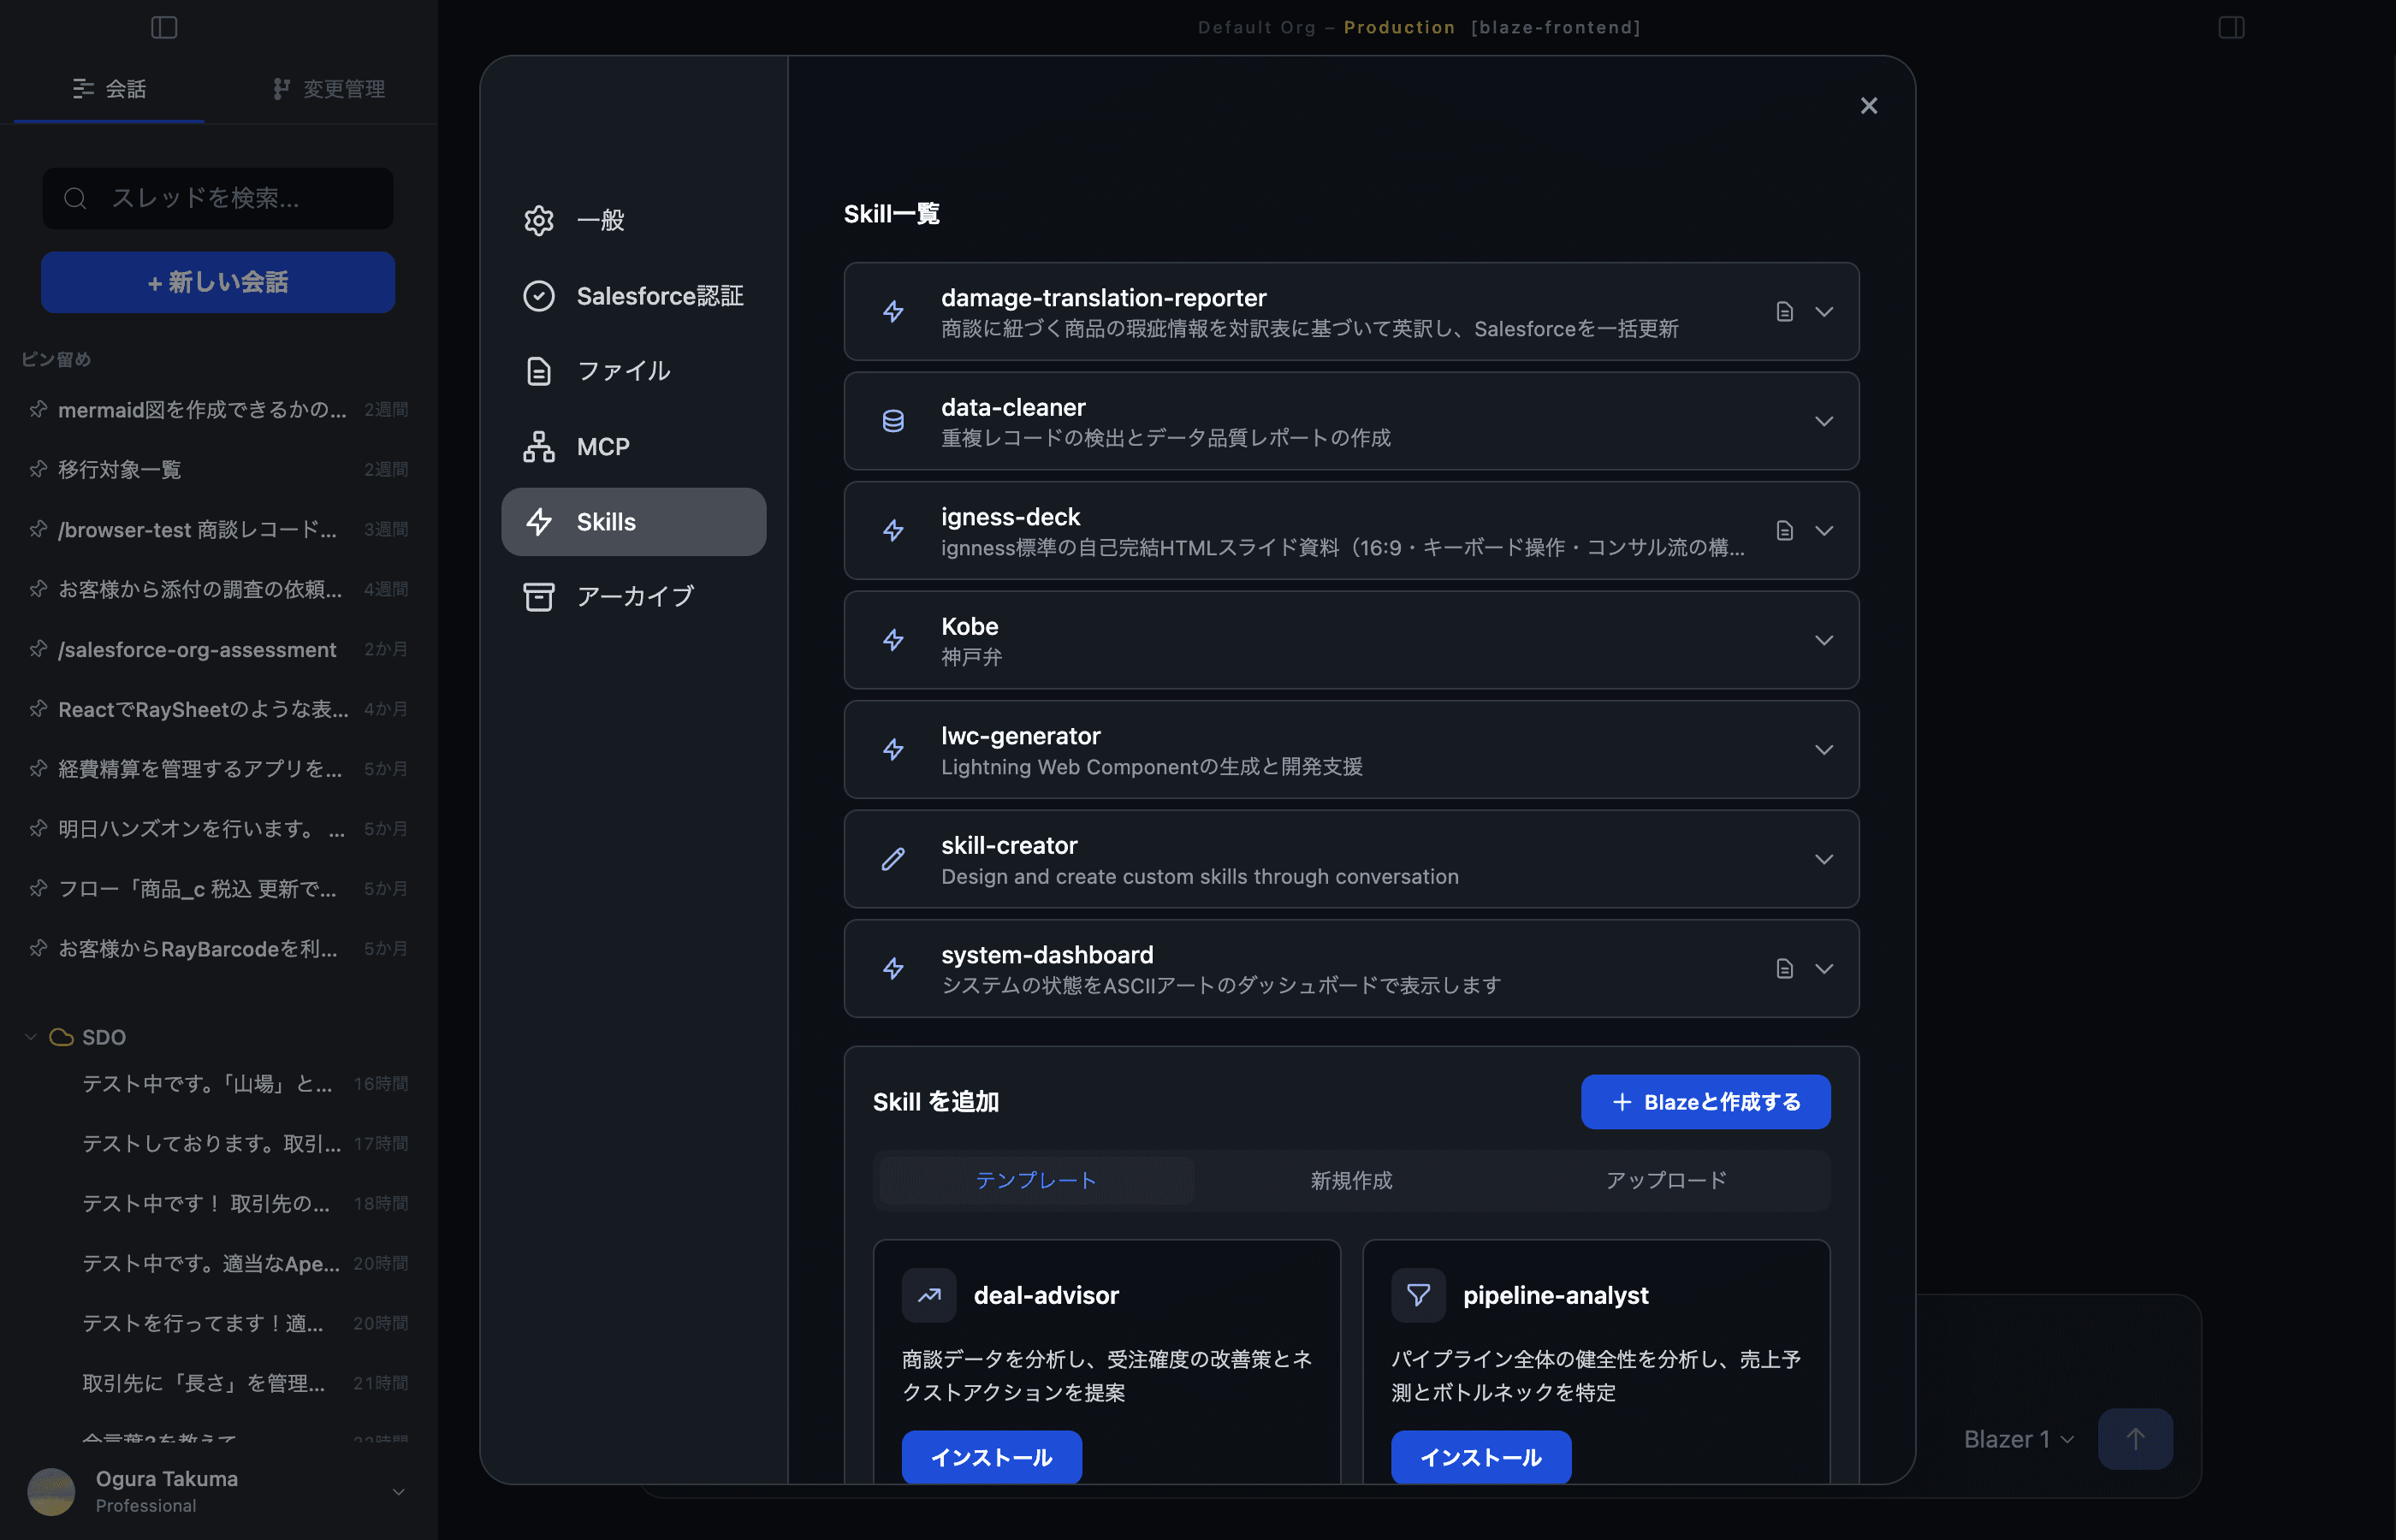
Click the profile at the bottom-left → Settings → Skills.
The “Skills” list shows every Skill you currently have. Click a row to expand its description / slash name / supporting files.
3. Invoke a Skill
In the main chat input (or the Launcher):
- Type
/— a dropdown of available skills appears - Move with ↑↓
- Press
Tabto confirm and execute
Note:
/<skill-name>is a placeholder. Replace it with the name shown on the row’s badge (e.g./kobe,/lwc-generator) — don’t literally type<skill-name>.
4. Add a Skill
The “Add a Skill” section offers five ways to bring in new Skills.
A. Install from template
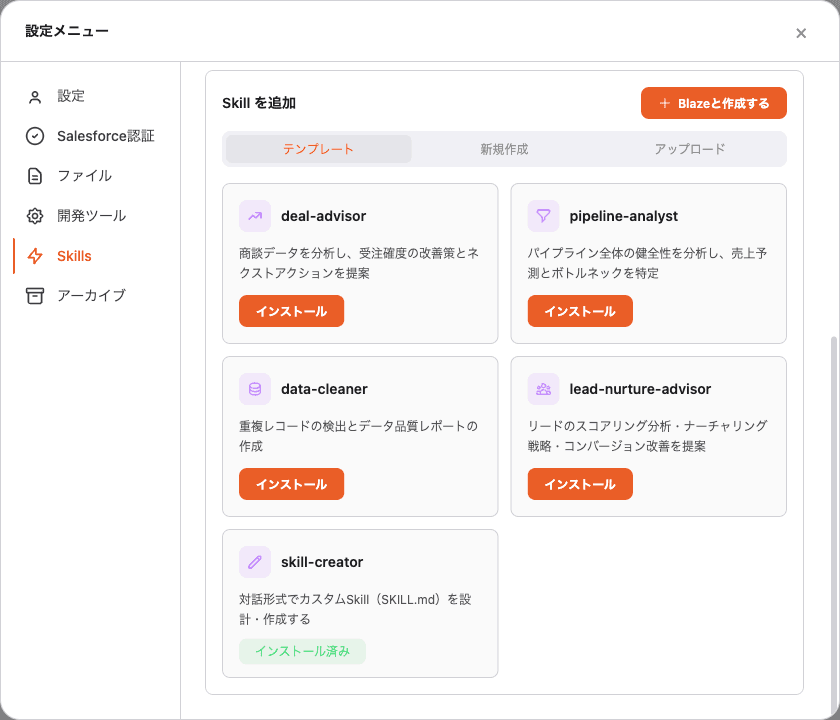
Pick one of the curated presets (e.g. deal-advisor, pipeline-analyst,
data-cleaner, lead-nurture-advisor, skill-creator) and click
Install once.
B. Create new
Use the “New” tab to write a SKILL.md yourself. Fill in the name, slash
identifier, description, and the body in Markdown.
C. Upload
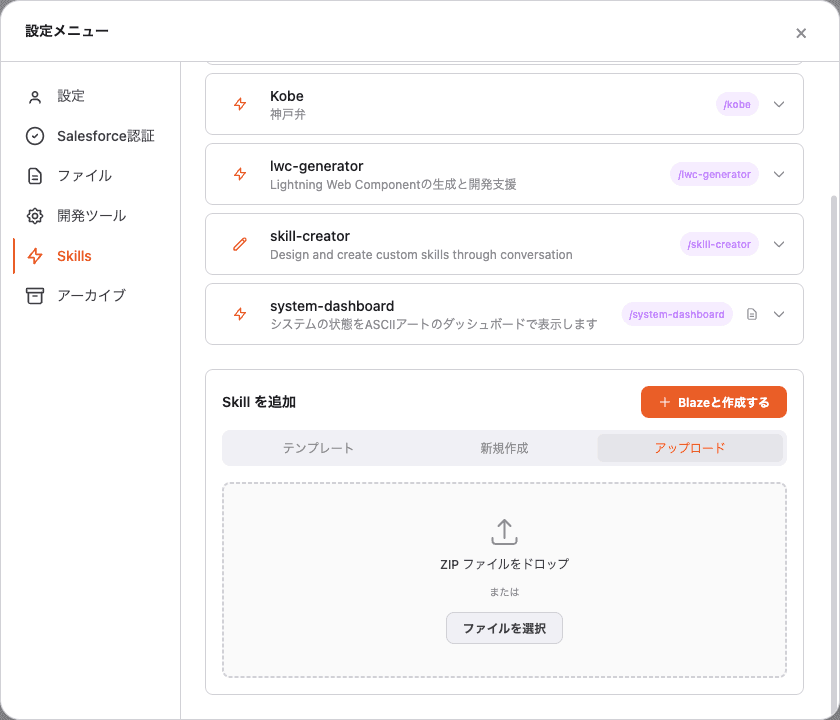
Drag-and-drop a ZIP file, or pick one with “Choose file”. Handy when you receive a Skill from a teammate.
D. Create with Blaze (recommended)
The “Create with Blaze” button on the top-right launches
/skill-creator, which interviews you and assembles a SKILL.md from
your answers — the easiest path when you don’t yet have a template in mind.
E. Add from GitHub
Paste the URL of a public GitHub repository and Blaze installs the Skills it contains (v0.17.1 or later).
- Open the GitHub tab under “Add a Skill” and enter the repository URL in
the form
https://github.com/<owner>/<repository> - Or send
/skill-install https://github.com/<owner>/<repository>from the chat input
When a repository contains several Skills they are installed together. If Blaze cannot decide which ones to install, it asks you to pick. When a name collides with an existing Skill you can skip it, replace it, or install it under a different name. Repositories containing executables, hooks, or symbolic links show a review screen before anything is installed.
Note: only the repository’s top-level URL is accepted. URLs that point at a folder or branch (
/tree/...) are not supported. To update, add the same URL again and choose “Replace”.
Example: the Igness LAMP skills install in one line:
/skill-install https://github.com/igness-ai/lamp-skills5. Edit / disable a Skill
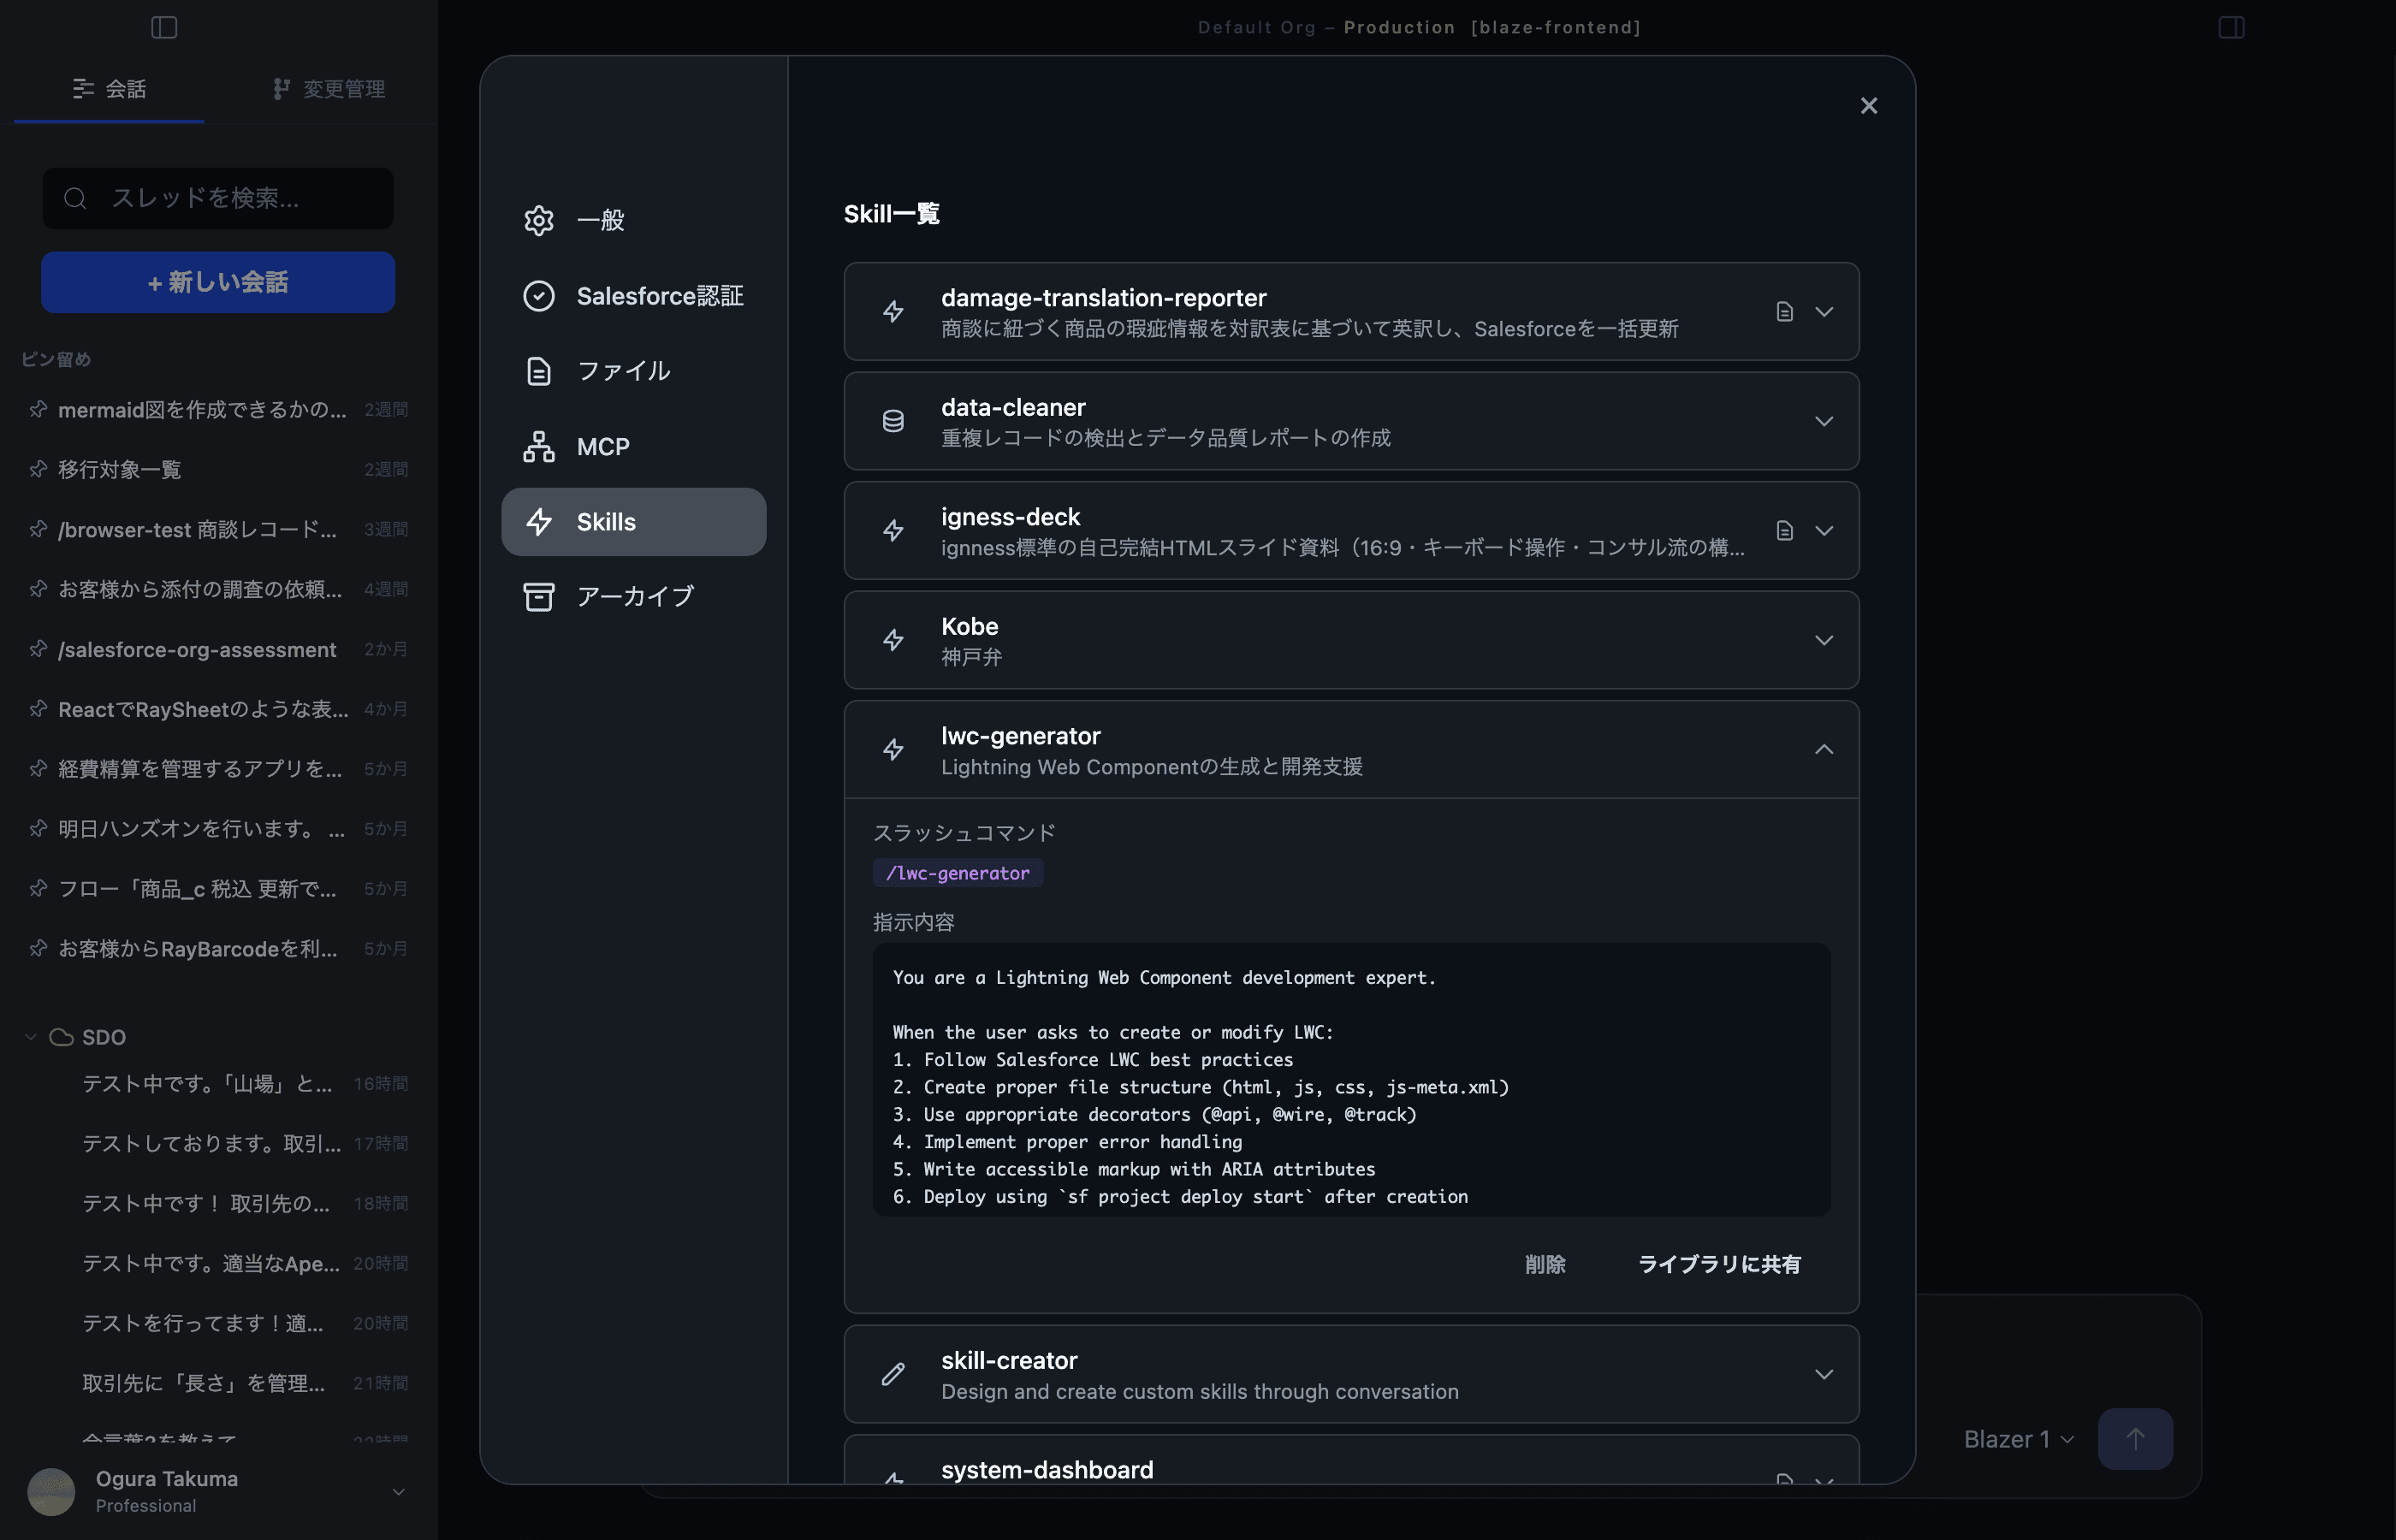
- Click the chevron (v) on a row to open its detail panel
- Skills with attachments show a 📄 icon
- You can also edit
SKILL.mddirectly from Settings → Files - Remove a Skill from its detail panel when it is no longer needed
6. Share with your team
Open a Skill’s detail panel and click “Share to library” to share it with other members of your organization. Once shared, teammates can add it to their own Blaze with a single “Add to Blaze” click. See Sharing and adding from the Library for details.
7. FAQ
Q. What’s the difference between a Skill and a slash command?
From the user’s perspective, none. When you add a Skill, its name becomes a
slash command available alongside the built-ins (/help, /clear, etc.) in
the autocomplete list.
Q. Can I run a Skill automatically?
Yes — set “Skill to run on file attach” in the Launcher settings, and a file dropped onto the Drop Shelf will execute that Skill automatically. See Launcher.
Q. Can I edit SKILL.md later?
Yes. Open Settings → Files, navigate to the Skill folder, and edit
SKILL.md. The change takes effect immediately.